START HERE -----> Finding your way around Moodle
| Site: | eLearn.MCOE.org |
| Course: | A beginner's guide to eLearn |
| Book: | START HERE -----> Finding your way around Moodle |
| Printed by: | Guest user |
| Date: | Monday, July 6, 2026, 7:36 AM |
1. Getting started. Set up your profile.
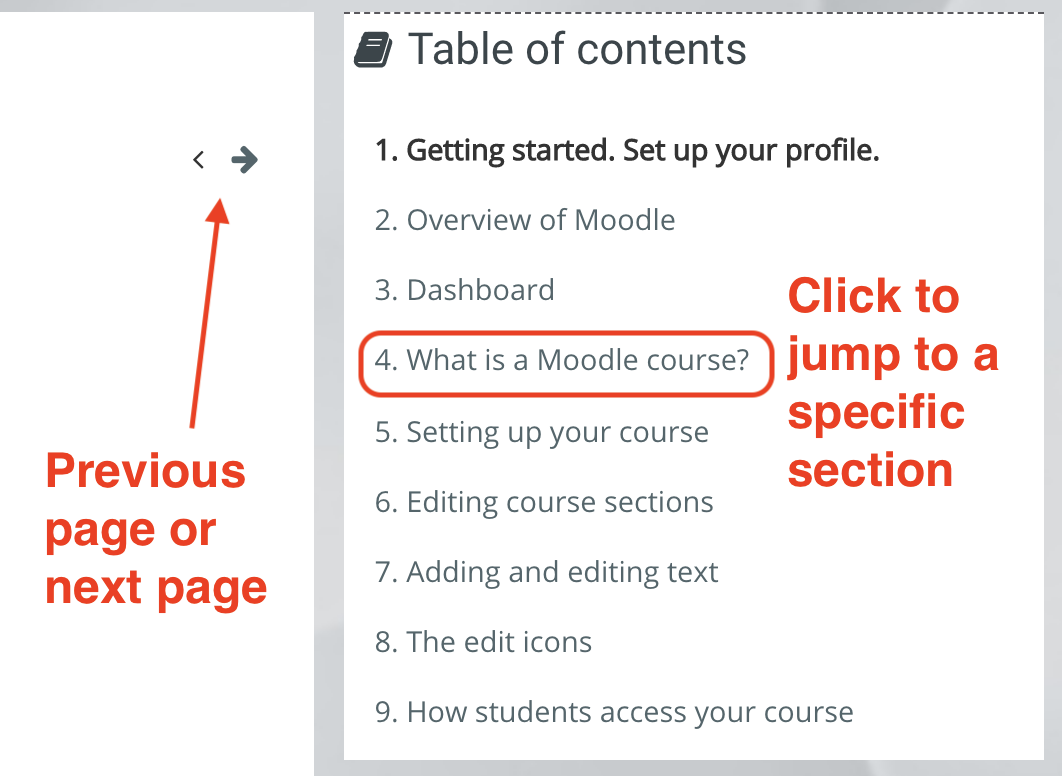
This is an example of a Moodle Book, which is a series of pages.
This book will show you how to find your way around a Moodle site, choose your course layout and upload documents by drag and drop.
The screenshot below shows you how you can move through the book either by clicking the arrows or by clicking on a page you want in the Table of Contents to the side of this text area:
Let's get started by updating your profile. Watch this video to learn how...
2. Overview of Moodle
How you navigate around Moodle depends partly on the theme that we will be using, but some common features are explained in the following video and the text underneath it.
There is a user menu at the top right when you are logged in and this has quick links to useful areas of Moodle. You can edit your profile from there or change your preferences.
You can access messages and notifications from the icons at the top.
Dashboard, either in the user menu or the nav drawer takes you to a customizable page with links to your courses and activities needing attention.
You can also navigate around using Moodle's navigation bar (which others call a breadcrumb trail) at the top of your screen.
Documentation links:
(These links to Moodle documentation open in a new window.)
3. Dashboard
Every user in Moodle has their own personal or customizable page called 'dashboard'.
The administrator may have set default items to be present on the page and you can expect to see an overview of your courses and anything needing attention such as assignments. You can also click the 'Customize this page' button to add elements
(blocks) of your own choice. You can also move side blocks into the centre if you want them to be larger and more prominent - the 'Recently accessed items' block for example
Documentation links:
(This link to Moodle documentation opens in a new window.)
Dashboard
Course overview
4. What is a Moodle course?
A Moodle 'course' is a space on a Moodle site into which you can add resources or activities for your learners. The video and text underneath guide you through a Moodle course.
A 'course' can be a simple page with documents for one teacher and one class, or a complex page with many different activities shared by teachers and several classes. It can be always available or have start and end dates, and learners can access it in a number of ways, such as enrolling themselves, being enrolled by their teacher, or by the Moodle administrator.
A course can display its materials in a number of ways or 'formats' for example in weekly sections or (named) topic sections. You can show all the sections at once or just reveal one at a time.
You can also add elements known as 'blocks' to the right, left or both sides of your central learning area depending on your theme.
Documentation links:
(These links to Moodle documentation open in a new window.)
5. Setting up your course
As a teacher you have some control over the appearance and layout of your course. For example, (if your institution allows it) you can change the full name or short name of the course, the course image, and you can change the layout of the main learning area. The video and text underneath show you how to add and modify your course sections and course information.
Changes are made by clicking the gear top right and clicking Edit settings. This is where you can, amongst other changes:
- change your course name and the colored course image (see video below)
- set start and end dates. These dates affect whether the course shows in the Future or Past sections of the dashboard course overview.
- set your course up in weekly sections or numbered topics (which you can rename.)
You can always go back and change any settings if needed.
Here is how you add a course image to make your course stand out on Moodle:
Documentation links:
(These links to Moodle documentation open in a new window.)
6. Editing course sections
If you have chosen weekly sections or topic sections for your course layout then you can rename these if you wish. You can also move sections up or down and quickly add or remove sections. This video and the text underneath show you how.
To rename a section, turn on the editing, click the pencil icon next to the section name, type your new section name and press Enter. It will appear in the nav drawer too.
Sections may be moved by dragging and dropping (if your browser and Moodle admin settings allow it), deleted, hidden and highlighted. Sections may be added by clicking the + under the bottom course section.
Documentation links:
Course homepage(This link to Moodle documentation opens in a new window.)
7. Adding and editing text and images
As you start typing text into Moodle you'll notice it has its own custom editor, known as Atto. The video and the text underneath tell you more about adding and editing text in Moodle.
Atto is Moodle's purpose-built editor for text. Amongst its features are the ability to drag and drop images directly into the text box and the option to check how accessible your content is for people with restricted sight. Content you add to the Atto editor is saved automatically at regular intervals, so you don't have to worry about losing it.
Documentation links:
(These links to Moodle documentation open in a new window.)
8. How students access your course
This video and the text underneath it explain how your learners can access your course.
Video tutorial
(Best watched full screen HD. If you prefer, download it from the Extra resources section)
How learners access your course will often depend on the policies of your institution and Moodle administrator. Some institutions might require students to create accounts and then find and enrol themselves into their chosen courses whereas others might automatically enrol all your learners into your course for you. Some might allow guest access; others not.
As a course teacher you can see which methods of enrolment are available by clicking the Participants link in the nav drawer and then clicking Enrolment methods from the gear menu. You can see who is already in your course and you can manually enrol learners into your course by clicking Enrolled users.
(Note that manual enrolment is not available on the Learn Moodle site. If you wish other participants to view your course, you can enable self-enrolment.)
A teacher cannot normally enrol another teacher into their course however. You will have to ask your administrator if you wish to share a course with another teaching colleague.
Documentation links
(These Moodle documentation links open in a new window.)